Where is the Status Bar in Excel?
You will find the status bar below the worksheet area in the Excel workbook (below the sheet tab names).
Excel does not allow you to change the position of the status bar, so you should always see the status bar in the same position.
Status Bar Not Showing – What to Do?
Although uncommon, there is a possibility that the status bar in your Excel is not showing.
Try the below keyboard shortcut to see if it sorts the issue:
CONTROL + SHIFT + F1
The above shortcut toggles in and out between the full-screen mode.
So if the full-screen mode is enabled on your system, you won’t be able to see the status bar, and using the above keyboard shortcut would bring you out of the full-screen mode, which should make the status bar visible again.
Another possible reason for the status bar not showing in Excel could be a conflict with an add-in. So if you are using any add-in, try disabling it and see if it solves the problem.
Default Options in the Status Bar in Excel
Now let me take you through the different options that are available in the status bar and what they mean.
Cell Mode
On the left-most side of the status bar, you’ll see some text written (such as Ready or Edit or Enter).
This tells you the cell mode based on the status of the active cell.
Let me quickly take you through the cell modes Excel has and the text you will see in the status bar for each mode.
Ready
When you see the Ready mode in the status bar, it means that the worksheet is now ready for you to do the work.
It also means that nothing else is going on in your worksheet, and you can go ahead and start the work.
Edit
When you see the edit mode in the status bar, it means that your cursor is within a cell, and the cell is in the edit mode, where you can enter data or formulas or edit the existing cell content.
So when you see the Edit mode, it means that the cell is being edited.
Enter
Enter mode is also like the Edit mode, with a tiny difference.
When you are in the Edit mode and you use the arrow keys, it is going to move the cursor within the cell itself. But when you are in the Enter mode, and you press the arrow keys, it is going to move to the cells in the direction of the arrow key.
You get into the Enter mode when you select a cell and press the F2 key twice or you double click on the cell.
Point
You will see the Point mode in the status bar when you enter a formula in a cell, and then you select any other cell that you want to use as a reference in that cell.
Macro Recording Icon
Just next to the cell mode, you have the macro recording icon in the status bar.
When you click on the macro recording icon, it opens the Record Macro dialog box where you can specify the name of the macro and some description and start recording the macro.
While the macro is being recorded, you will notice that the icon in the status bar changes into a transparent square, and you can stop recording the macro by clicking on this record macro icon.
Accessibility Check
Next to the record macro icon, you will see the accessibility check option (which tells you whether the workbook accessibility is good or not). This is Microsoft’s initiative to make sure that everyone can work with the Excel workbooks, including people with disabilities.
If there are any accessibility issues in your workbook, you will see the text ‘Accessibility: Investigate’ in the status bar.
And when you click on it, it is going to open the Accessibility pane on the right that will guide you on how to make your workbook accessible to everyone.
And if there are no issues, you will see the text ‘Accessibility: Good to Go’
Workbook Views
On the right side of the status bar, you have three Workbook Views icons (Normal, Page Layout, and Page Break Preview):
- Normal View – This is the view that you usually see when you open an Excel workbook (hence called Normal)
- Page Layout View – Page Layout view is helpful when you want to see how your work would look when printed. It shows you the start and end row and column for each page as well as the headers and footers (if added)
- Page Break Preview – If you have added any page breaks in your worksheet, you can use the Page Break Preview option to see where these would appear when you print your worksheet
Note that you can also get these options in the ‘View’ tab in the ‘Workbook View’ group.
Zoom-in Zoom-Out Icons and Zoom Slider
To the right of the workbook views icons, you will find the zoom option-related icons.
Zoom Slider
Using the zoom slider, you can manually change the zoom levels of the worksheet.
By default, the zoom slider is in the middle at a 100% zoom level. If you move the slider to the left, it is going to zoom out (so you will see more rows and columns), and if you move the slider to the right, it is going to Zoom-in the worksheet.
Note that you can zoom between 10% and 400% in Excel
Zoom In and Zoom out icon:
On either side of the zoom slider, you also have the zoom-out and zoom-in icons.
Clicking on these icons would change the zoom level by 10%.
Zoom Level
At the right end of the status bar, you have the zoom level (that shows the current zoom value of the worksheet).
When you click on the zoom level option, it is going to open the Zoom dialog box where you can select from any of the pre-existing options, or you can manually specify the zoom setting you want for the worksheet.
Data Stats for the Selected Range
When you select a range of cells in the worksheet, it is also going to show you some statistics about that selected range in the status bar.
By default, it shows the Sum, Count, and Average values for the selected range.
In case you select a range of cells that contains only text data, it is only going to show you the count of the cells.
Customizing the Status Bar
While the Excel team has tried to show some of the useful information in the status bar by default, it also allows you to customize the status bar, where you can choose to show more or less information.
Below are the steps to customize the status bar in Excel:
Step 1 – Right-click anywhere on the status bar
step 2 – In the Customize Status Bar options that open, you can select any option that doesn’t have the green tickmark next to it to make it available in the Status bar. Alternatively, if you click on any of the options that already have the green tick mark, the green tick will be removed, and that option will not be shown in the status bar.
As you will notice, most of the Customize Statusbar options are already enabled (and have the green tick on the left).
Let me quickly cover ones that you can consider enabling for the status bar:
Workbook Statistics
When you enable the Workbook Statistics option in the customized status bar menu, you will notice that this option also appears in the status bar (next to the Cell Mode).
And when you click on this option in the status bar, it is going to open the workbook statistics dialog box that is going to show you some statistics about the current sheet and the workbook.
If you work with Excel workbooks that have a lot of worksheets, you may want to enable the Sheet Number option in the Customize Status bar menu.
Once this is enabled, you will see the current sheet number in the status bar (as shown below)
Caps Lock / Num Lock / Scroll Lock
When you enable the Caps Lock, Num Lock, and Scroll Lock options for the status bar, it will be shown in the status bar in case these are enabled.
For example, below, I have the screenshot where I have enabled all these three options to be shown in the status bar and have also activated them.
Maximum / Minimum Value in the Selected Range
When you select a range of cells in a worksheet, the status bar automatically shows you the data, such as sum, count, and average.
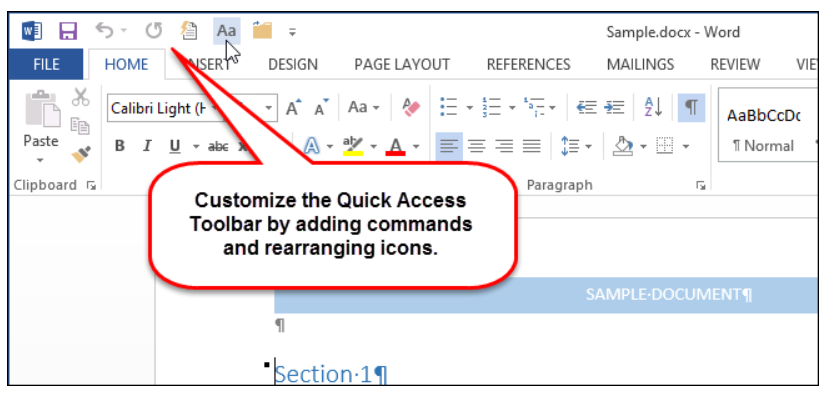
 When you click on the drop-down arrow next to the toolbar it offers many more commands. With a left click you can even add any of these set of commands to Quick