Starting excel

Identifying Parts of the Screen

The Excel window is illustrated in Figure 1-4. The bulk of the screen is occupied by the worksheet window. This grid provides a convenient workspace where you can enter and manage your data. Surrounding the worksheet window are several command interfaces, each of which allows you to receive information about, or apply functions to, the data on the worksheet.

The Parts of the Excel Window

Worksheet control buttons The worksheet control buttons allow you to minimize, maximize/restore, or close the worksheet.
Formula bar The formula bar allows you to enter and edit data in the worksheet.
Worksheet window The worksheet window contains the open, active worksheet. Worksheet windows can be moved and sized. You can have more than one worksheet window open at the same time.
Scroll bars The vertical and horizontal scroll bars enable you to move quickly through the worksheet, vertically and horizontally.
Ribbon The Ribbon is designed to help you quickly find the commands that you need to complete a task. Commands are organized in logical groups, which are collected together under tabs. Each tab relates to a type of activity, such as writing or laying out a page. To reduce clutter, some tabs are shown only when needed.
Title bar (extreme top right of the Excel window) The title bar contains the name of the application and the active file.
File Button Clicking on the File Button displays a drop down menu containing a number of options, such as open, save, and print.
The options in the File Button menu are very similar to options found under the Office Button and File menu in previous versions of Excel.
Sheet tabs (Worksheet tabs) The sheet tabs let you switch between worksheets in a workbook by clicking the appropriate tab.
Quick Access Toolbar The Quick Access Toolbar (see Figure 1-5) is a customizable toolbar that contains a set of commands that are independent of the tab that is currently displayed. You can move the Quick Access Toolbar from one of the two possible locations, and you can add buttons that represent commands to the Quick Access Toolbar.
The Ribbon

The Ribbon is the strip of buttons and icons, organised into TABS, located above the work area in Excel 2013. The Ribbon (with its various tabs) replaces the menus and toolbars found in earlier versions of Excel. At the top of the actual Ribbon are a number of tabs, such as Home, Insert, and Page Layout. Clicking on a tab displays the options located in this section of the ribbon.

For example, when Excel 2013 opens, the options under the Home tab are displayed (see image to the right). These options are grouped according to their function – such as Clipboard (includes cut, copy, and paste options), and Font (includes current font, font size, bold, italic, and underline options).

Clicking o n an option on the ribbon may lead to further options contained in a Contextual Menu that relate specifically to the option chosen.

Although, as written in the label for Figure 1-4, tab sections can be referred to as [tab name] ribbon, like Home Ribbon, Insert Ribbon, etc, tab sections can also be referred to as only their tab names. Eg. the Home tab, the Insert tab, the Page Layout tab, etc.

Title Bar in Excel

Title Bar is the bar holding title of the excel file. But apart from showing title, it also contains many other important functionalities. so let’s get familiar with Title Bar in this blog post.

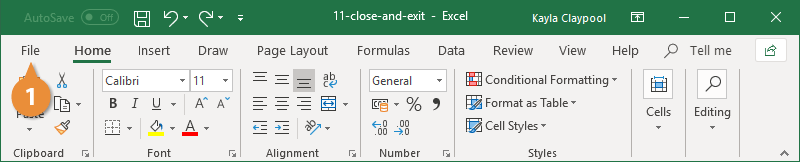
Title Bar is divided in 03 parts:
1. Quick Access Toolbar
2. File Name
3. Minimize, Maximize/Restore, Close buttons

Let’s see in detail about this.

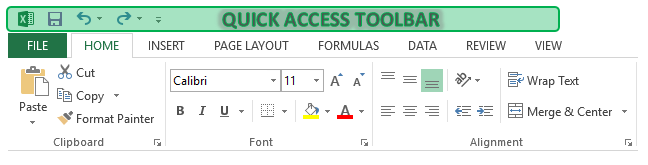
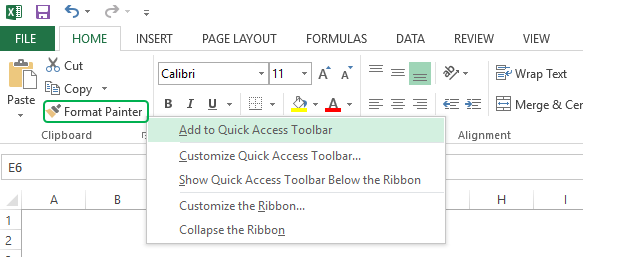
Quick Access Toolbar:

 
The commands which we are using frequently can be added to Quick Access Toolbar. Following steps will help you to add desired commands here.

1. Right click on the desired command. (In below screenshot we have selected “Format Painter” as a desired command)

 
2. Select option “Add to Quick Access Toolbar”.

 
3. Now, you will see “Format Painter” command is added in the Quick Access Toolbar.

4. To remove desired command from Quick Access Toolbar, just right click on the command and then select option “Remove from Quick Access Toolbar”.


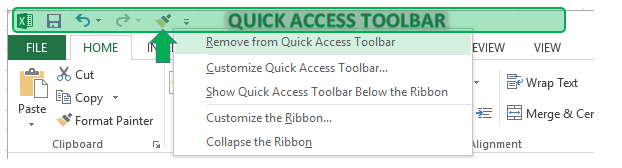
5. Now, you will see “Format Painter” command is removed from Quick Access Toolbar.


File Name:

It shows the file name which we have given to our excel file. In below screenshot, “Title Bar” is the name of excel file and “- Excel” indicates that this is excel file.


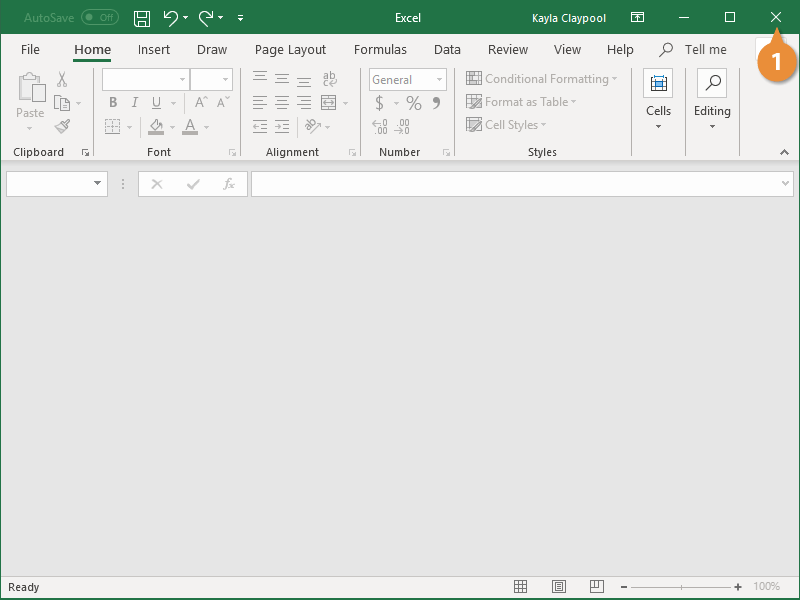
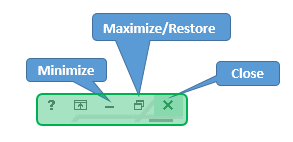
Minimize, Maximize/Restore, Close Buttons

These buttons are found on right side of the Title Bar.

1. Minimize: This button is similar in look like minus sign. If we click on this button excel window will move to the Taskbar (Taskbar is located at the bottom of the screen).
2. Maximize/Restore: If we click on this, then the excel window will fit to the full screen. If we click this button when excel window is already fit to full screen, then excel window will appear in smaller size which allows us to resize the window.
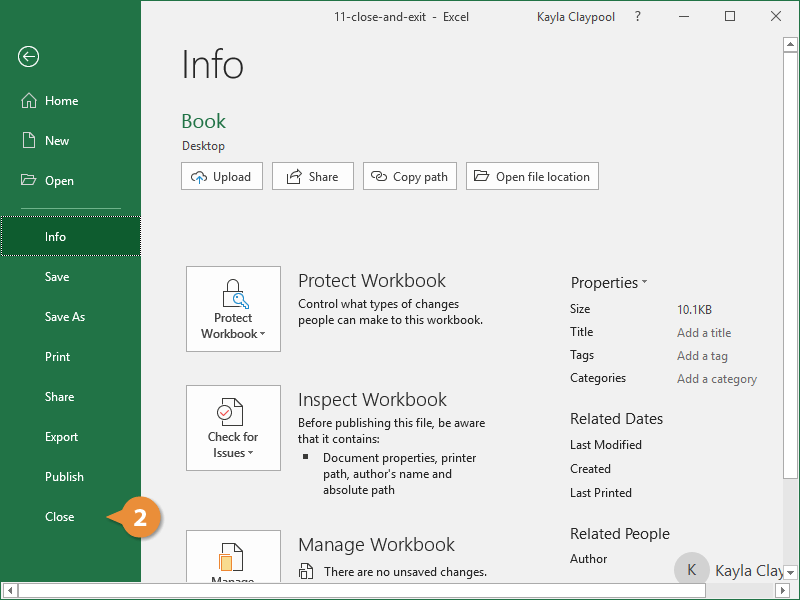
3. Close: If we want to close excel file then click on this button.

This was all about “Title Bar”. In next blog post we will see details about “Ribbons”. Stay tuned!

Close a Workbook

Each spreadsheet window must be closed individually. When you have only one spreadsheet open and want Excel to stay running:

  1. Click the File tab.
    Close a Workbook

Click the Close button.

Close a Workbook

Press Ctrl + W to close a workbook.

You can close all open workbooks by holding down the Shift key as you click the Close button.

If you have multiple worksheets open, you’ll need to close each of them individually.

The file is closed but Excel is still running.

  1. If prompted, select from one of the following options:
    • Save: Save your changes.
    • Don’t Save: Discard any changes you’ve made.
    • Cancel: Don’t close the workbook.

Close Excel

If you click the Close button on the title bar when you have only one Excel file open, the workbook will close and you will exit the Excel program.

  1. Click the Close button.
    Close a Excel

Excel closes.

Open Backstage View in Excel

When you open Excel, it shows you an opening window called the Backstage view. It is the first view you get when you open Excel.
opening-window-backstage

You can see in the above screenshot that this window has the option to start working in Excel. But it’s called backstage view because it starts at the back when you work in Excel. And to open it while working, you need to click on the File Tab on your Excel Window.

go-to-file-tab

Simply put, this view of Excel stays at the back, and you need to go to it from the File tab. You also have a backstage idea of Excel on Mac when you open it.

view-of-excel-at-back

And if you want to open it back, you need to go to File New.

go-to-file-new

Keyboard Shortcuts

If you are working in Excel and you want to open the backstage view, you can use the keyboard shortcut:

Alt + F

Option Available on Backstage View

There are some essential options available on it:

  • New: To create a new workbook.
  • Open: To open an already saved workbook.
  • More: To open the Excel Options and Account Information.
options-available-at-backstage-view
 

The above option will remain even if you haven’t opened a workbook. But once you open the workbook, you will get more options.

more-options-when-excel-is-opened

You can open a new blank workbook at the top of the window. You can also use some predefined templates that are available in Excel.

new-blank-workbook

At the bottom of the window, you have a list of recently used workbooks and a search bar to search for the workbooks.

recent-used-workbooks

You can also pin a workbook you like using more often than others. Then, it lets you open it with a single click from the Pinned list.

pin-a-workbook

When you click on the “Open” option, you get more options to locate a file to open.

more-options-to-locate-a-file

Close the Backstage View

If you haven’t opened a file, you must open a workbook to avoid the backstage view. Then, and you already have a workbook open, you need to press the escape key or click the back button.

close-backstage-view